If you have updated your iPhone to iOS 18, the screen record button on your iPhone is probably missing from the control centre.
So if you didn’t see the Screen Record Button on your iPhone’s control center, no need to worry. In this guide, we will tell you everything about how to add screen record to control center.
This is pretty easy to do. You just have to look for the screen record button widget on your control centre, and add it to the control centre.
In Control Centre, you can start a screen recording and capture sound on your iPhone, it will record the screen whenever you need.
Screen recording has become an essential feature for many iPhone users, whether you’re looking to create tutorials, capture gameplay, or save a memorable moment from a video call.
Fortunately, Apple has made it relatively easy to enable and access the screen recording feature on your iPhone.
So let’s move further to our guide for adding a screen record button.
Contents
Add the Screen Record Button to the Control Center
To add a Screen Record Button to your iPhone’s Control Center, follow these easy steps.
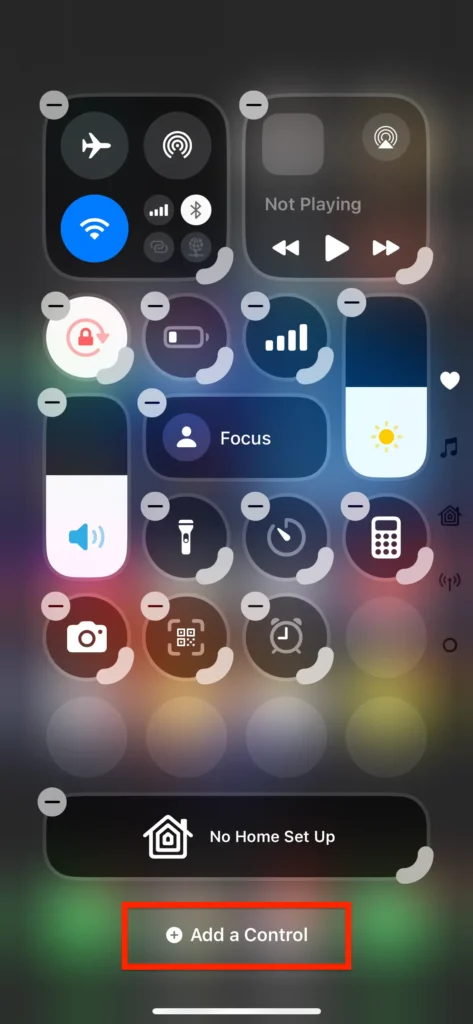
1. Swipe down from the top right-hand corner of your screen, here you will see an (+) icon, click on this icon.

2. Now you will see an Add a Control Option at the bottom of the control centre. Click on this option.

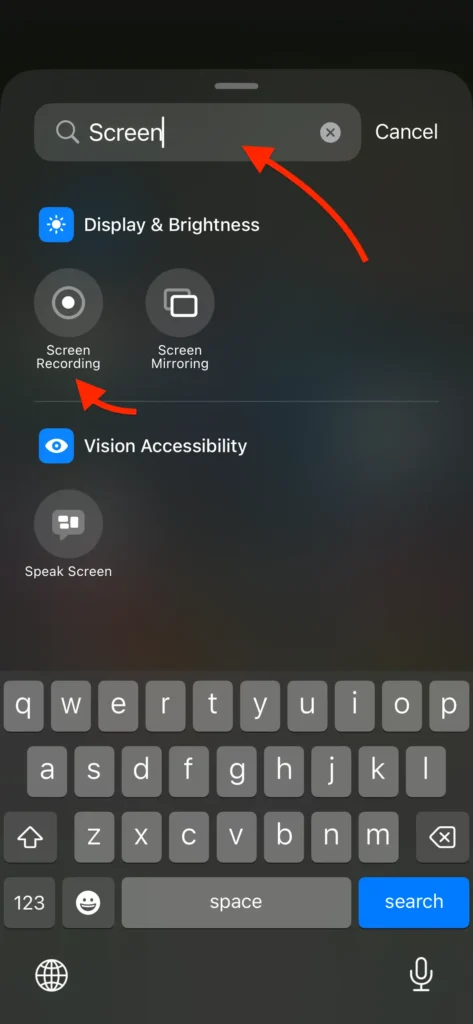
3. Now you will see a search box, type and search Screen Recording here. Now click on the Screen Recording option, as shown in the screenshot below.

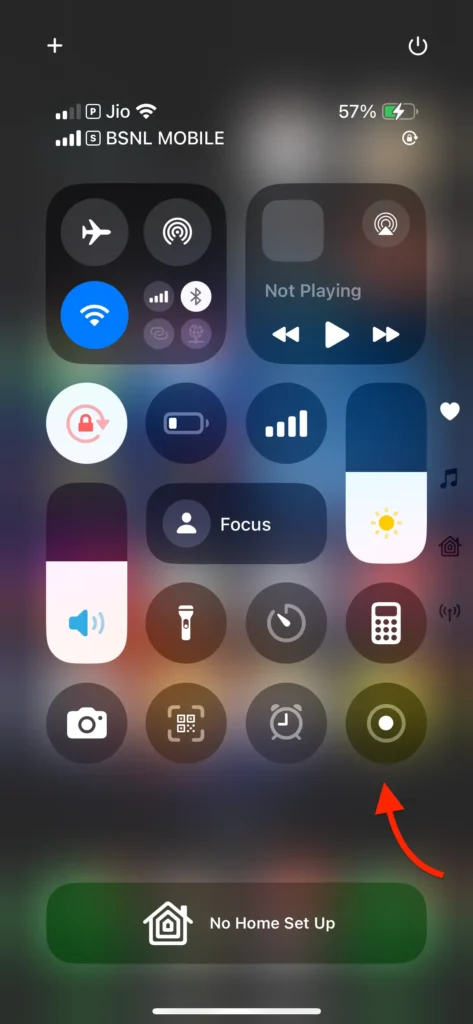
4. After this, now you can see you have successfully added the screen recording widget to your control centre.

You can now use your control centre to start screen recording on your phone.
How to use the Screen Record Button
Now that you’ve added the screen recording option to your Control Center, it’s time to learn how to use it:
- Swipe down from the top-right corner of the screen to access the Control Center.
- Look for the screen record button, which looks like a solid circle within a ring.
- Tap the screen record button to start recording. You’ll see a countdown of three seconds before the recording begins.
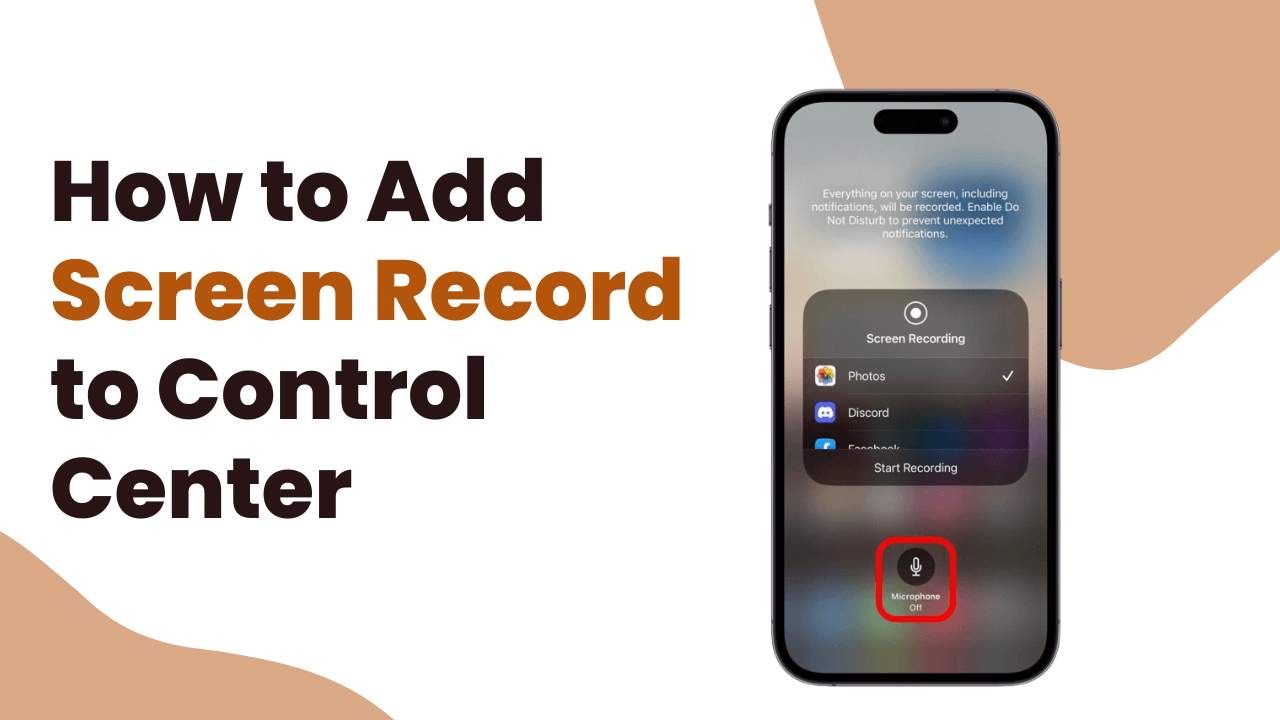
- To capture audio along with your screen recording, press and hold the screen record button. This will open a menu where you can enable the microphone by tapping the microphone icon.
- Once the countdown finishes, the recording starts, and a red bar or a red dot will appear at the top of the screen, indicating that the recording is in progress.
How to Stop the Recording?
When you’ve captured what you need, stopping the recording is just as simple:
- Tap the red bar at the top of your screen (or the red dot) to stop the recording.
- A prompt will appear asking if you want to stop recording. Tap Stop.
Your recorded screen will be saved on your photos app.
Conclusion
Adding the screen record button to your iPhone is a simple process that opens up a world of possibilities for capturing and sharing your screen.
Whether you’re creating tutorials, sharing gameplay, or saving precious moments, knowing how to effectively use this feature can enhance your iPhone experience.
With the steps outlined in this guide, you’ll be screen-recording like a pro in no time! So go ahead, enable that screen record button, and start capturing your iPhone’s screen today.
FAQ’s
Q. Can I record audio while screen recording?
Q. What can I use screen recording for?
Q. Is the process the same for all iPhone models?
If need any further assistance or help from us you can just comment down below. We will try to help you. Thansk for reading this.
More Articles:


